 how-to
How to Test Used Computer Hardware Before You Buy
Last Updated: November 2, 2026
Quick Summary
To learn how to test used computer hardware, boot the machine with a USB diagnostic tool, then check its memory, drive health, CPU and GPU under load. Photograph the serial number label before you pay, and walk away from any unit with a swollen battery or burning smell.
- Run MemTest86 for at least three full passes; any error count above zero means the memory should be replaced or avoided.
- Read SMART data with CrystalDiskInfo and check that health status reads Good or OK and reallocated sectors are not rising.
- Run a CPU stress test for 20 to 30 minutes and watch for overheating, loud fans or throttling.
- Photograph the serial number and model label before you pay, since sellers sometimes swap parts later.
- Never power on a device with a swollen battery, cracked power adapter or burning smell.
Table of Contents
- What You Need Before You Start Testing
- Used Computer Inspection Checklist: Physical and Power-On Checks
- Used PC Hardware Diagnostic Tools You Can Run From a USB Drive
- How to Check Computer RAM for Errors
- How to Check SSD Health and Hard Drive Condition
- Stress Testing the CPU, GPU, and Cooling
- Reading Your Results and Deciding Whether to Buy
- Frequently Asked Questions
What You Need Before You Start Testing
Learning how to test used computer hardware before you buy saves money and prevents headaches. Most problems show up fast if you know what to look for.
Gather these items before you meet a seller or open a box:
- A USB drive (8 GB or larger) for a bootable diagnostic tool
- A second working computer to build or test a known-good system
- A notepad or spreadsheet for recording serial numbers, results and photos
- A flashlight and a small screwdriver set
- A power strip with a surge protector
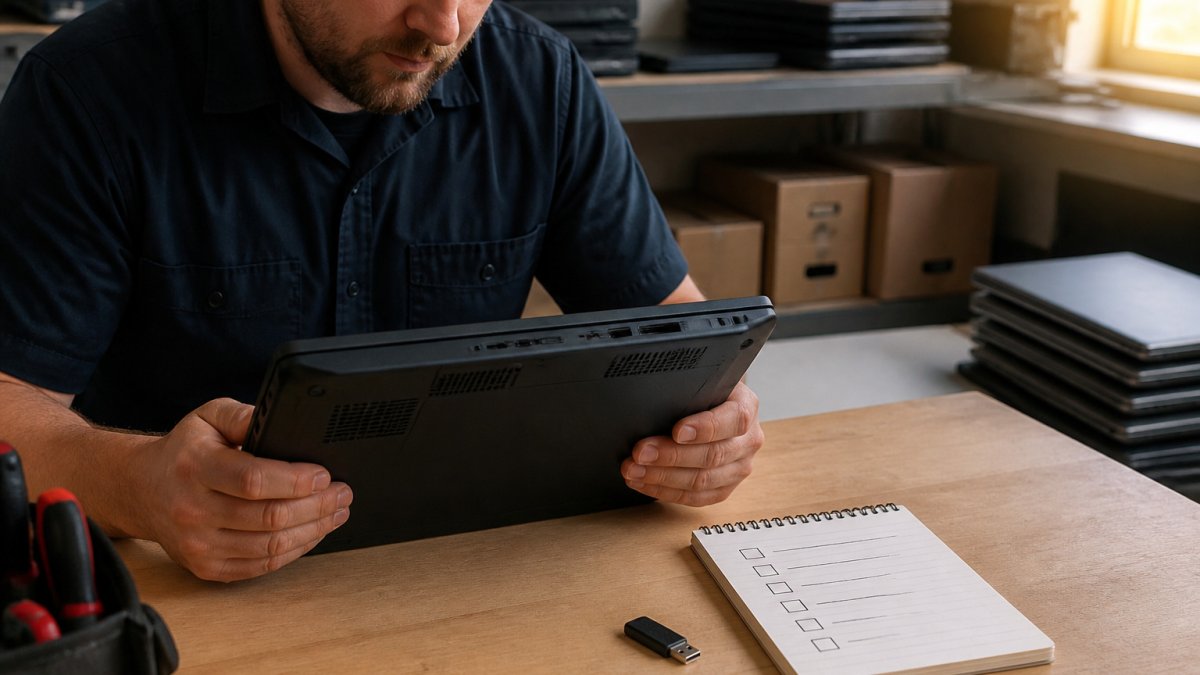
Bring the notepad and a charged phone to take photos of labels, ports and damage. Record the serial number and model before you pay, because sellers sometimes swap parts later.
Watch out: Never test a device with a damaged battery swelling or a cracked power adapter. Stop and walk away from any unit that smells of burning or gets hot without a load.
Used Computer Inspection Checklist: Physical and Power-On Checks
Buyers often get only a short window with a seller's machine, so this section gives you a prioritized sequence for that window, then the deeper checks to run once you own the hardware.
Before you touch anything. Ask the seller to leave the machine powered off and unplugged. Photograph the serial number label, the model sticker, and any warranty seals before you power on, sellers occasionally swap parts after a sale, and a timestamped photo is your only proof. Confirm the serial number matches the listing.
The 10-minute in-person sequence. Work in this order so that a failure early saves you time later:
- Exterior (2 minutes). Check case corners for dents that suggest a drop, look for mismatched screws or pry marks around the seams, and shine a light into the vents for liquid stains or heavy dust. Bulging on the bottom of a laptop or a trackpad that sits proud of the chassis means a swollen battery, stop there.
- Ports and display (2 minutes). Plug in a USB device you brought and confirm it enumerates. Open a solid white image and a solid black image full-screen and look for dead or stuck pixels. Flex the lid gently and watch for flicker, which points to a failing display cable.
- Power-on and POST (2 minutes). Cold boot the machine and watch the POST screen. A single clean boot is normal; a boot that requires two attempts, beeps in a pattern, or hangs at a logo is a fail. Enter the BIOS and confirm the CPU model, installed RAM amount, and drive model match the listing.
- Storage and memory quick check (3 minutes). Boot a USB drive with CrystalDiskInfo and read the SMART health status. Then run one quick pass of MemTest86, not a full overnight run, just enough to catch a stick that is dead on arrival.
- Load check (3 minutes). Run a short GPU load test and watch for artifacts and fan behavior. You are not proving the card is perfect; you are catching the obvious failures.
What to skip in person. Do not attempt a full CPU stress test, an overnight memory run, or a surface scan during a short meeting. Those belong in the post-purchase burn-in, described below. Trying to cram them in wastes your window and pressures the seller.
The post-purchase burn-in. Once the machine is yours, run the full versions of the tests in the sections that follow: three or more MemTest86 passes, a 20-30 minute CPU stress test, a 20-30 minute GPU load test, and a full surface scan on any mechanical drive.
Watch out: Never power on a device with a swollen battery, a cracked power adapter, or a burning smell. A swollen lithium battery can ignite when charged, and a damaged adapter can short the board. Walk away from those units regardless of price.
If you cannot test in person. Buy from sellers who offer a written return window and accept returns for functional faults. Ask for a short video of the machine booting, entering the BIOS, and showing the SMART health screen before you pay.
The table below summarises the in-person sequence so you can scan the order of checks and what each one covers.
| Step | What to check | Time |
|---|---|---|
| Exterior | Case dents, pry marks, vent dust or liquid stains | 2 minutes |
| Ports and display | USB enumeration, dead pixels, lid flicker | 2 minutes |
| Power-on and POST | Clean cold boot, BIOS specs match listing | 2 minutes |
| Storage and memory | SMART health status, one quick MemTest86 pass | 3 minutes |
| Load check | Short GPU load test for artifacts and fan behavior | 3 minutes |
Used PC Hardware Diagnostic Tools You Can Run From a USB Drive
Bootable diagnostic tools let you test a machine without installing anything on its drive.
Common choices include:
- Ultimate Boot CD: a collection of tools for memory, drive and CPU checks
- MemTest86: a dedicated memory tester that runs for several passes
- CrystalDiskInfo: reads SMART data from hard drives and SSDs in Windows
To set one up, download the ISO, write it to the USB drive with a free imaging tool, then boot from that drive. Check the boot menu key for your machine, often F12 or Esc.
Run a diagnostic tool for at least one full pass. A quick scan can miss intermittent faults.
How to Check Computer RAM for Errors
Bad memory causes random crashes, blue screens and corrupted files. Knowing how to test used computer hardware for RAM takes time, but it catches problems that a quick boot will not.
Follow these steps:
- Boot into MemTest86 from your USB drive.
- Let it run at least three full passes. Overnight is best.
- Note any error count above zero.
- If you can, test each stick alone by removing the others.
A machine with zero errors after several passes is a strong sign the memory works. Any error means the stick should be replaced or the machine avoided.
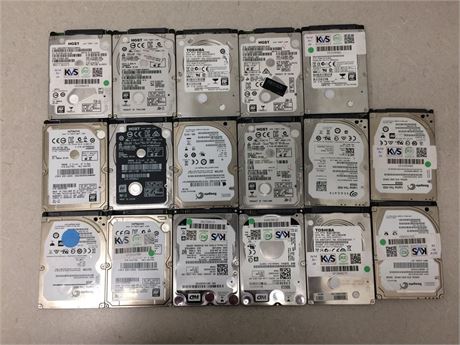
Lot of 17 500 GB 2.5" SATA HDDs - Good Drive Health - Mixed Brands →
Watch out: A clean memory test does not rule out a failing motherboard slot. If errors appear only in one slot, test that slot separately before buying.
How to Check SSD Health and Hard Drive Condition
Storage fails in ways that look like software problems. Learn how to test used computer hardware drive health before you trust the machine.
Use CrystalDiskInfo or a similar tool to read the SMART data. Look at these values:
- Health status: should read "Good" or "OK"
- Reallocated sectors: a rising count signals a dying hard drive
- Power-on hours: useful for judging remaining life
- Media wearout or life remaining (SSDs): a low percentage means limited life left
Run a surface scan on hard drives. Slow reads or clicking sounds are warning signs. A drive with any reallocated or pending sectors should not be trusted with important data.
KVSAuctions.com offers a lot of 17 500 GB 2.5" SATA HDDs with good drive health, which may suit a reader who needs spare storage.
Stress Testing the CPU, GPU, and Cooling
A machine can look fine at idle and still overheat or crash under load. Stress tests reveal those issues.
For the processor and cooling, run a CPU stress test for 20 to 30 minutes and watch temperatures. For graphics cards, run a GPU benchmark such as Unigine Heaven and watch for artifacts, crashes or thermal throttling.
Keep an eye on these signs:
- Temperatures that climb above the safe range for the chip
- Fans that stay loud or stop spinning
- Screen tearing, flickering or colored blocks on the display
- A sudden drop in frame rate or performance
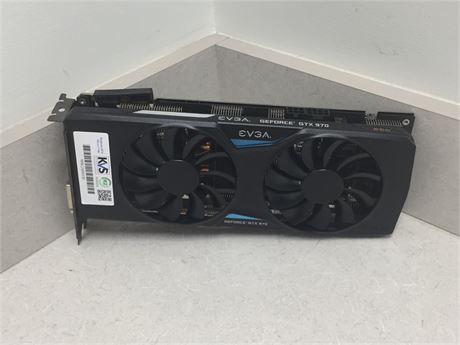
KVSAuctions.com lists the Nvidia EVGA GTX 970, 4GB GDDR5, which is tested and working in a working machine. Even so, run your own load test before you pay.
Reading Your Results and Deciding Whether to Buy
Good testing is only useful if you can interpret the numbers. Benchmarks are only useful if you know what a passing result looks like. Use the thresholds below as a practical reference, then apply the decision rules at the end.
Memory (MemTest86). A pass means zero errors across at least three full passes. One error is a fail, memory errors are not intermittent in a benign way, and a stick that throws a single error under load will throw more later. If errors appear only when a specific stick is installed in a specific slot, treat both the stick and the slot as suspect.
Storage (SMART data). A pass means health status reads "Good" or "OK," reallocated sector count is zero or stable, and pending sector count is zero. A caution flag is any nonzero reallocated count that is not rising between two reads taken an hour apart.
CPU and cooling. A pass means the processor completes a 20-30 minute stress test without throttling below its rated base clock and without errors in the stress tool's log.
GPU. A pass means a 20-30 minute load test such as Unigine Heaven or FurMark completes without artifacts, driver resets, or black screens, and the card holds a stable frame rate without dropping to its idle clock.
Motherboard and power supply. These are the hardest to test in isolation.
Decision rules. Mark any component as a fail if it meets a fail condition above. Then apply this rule: one fail on a cheap, replaceable part (a stick of RAM, a hard drive, a fan) can still be a good deal if the repair cost plus the price stays below the going rate for a working equivalent.
A passing result is not a guarantee of long life. Ask about warranty and return terms before you pay, and keep your notes and photos with the order so you have evidence if you need to file a claim.
Frequently Asked Questions
How do you test a used computer before buying it?
Start with a visual inspection for cracks, bent ports, and corrosion, then power the unit on and confirm it reaches the operating system without errors or unusual beeps. Next, check the specifications against the listing, run a memory test and a drive health check, and finish with a stress test under load. Testing a used computer this way takes roughly an hour and catches most hardware faults before you pay in full. If the seller refuses a power-on test, treat that as a warning sign.
How long should you stress-test a used computer?
A stress test of 30 to 60 minutes is usually enough to reveal overheating, instability, or a failing component. Watch CPU and GPU temperatures during the run and look for crashes, artifacts, or sudden drops in performance. If the system is stable for the full period and temperatures level off, the cooling is likely working. Run a longer test if you plan heavy workloads such as video editing or gaming.
How can you tell if a used computer is overheating?
Signs of overheating include fans running at full speed at idle, a hot chassis, thermal throttling that slows the processor during load, and unexpected shutdowns. Monitor temperatures with a free utility during a stress test and compare readings against the processor manufacturer's rated maximums. Dust buildup in vents or a dried thermal paste layer can also cause problems that a quick cleaning and repaste may fix.
What are the warning signs of a failing computer component?
Common warning signs include random blue screens or crashes, data errors, clicking or grinding from a hard drive, bulging capacitors on the motherboard, and graphical artifacts on screen. Memory errors often show up as intermittent crashes that appear under load. Any of these symptoms during testing is a reason to walk away or negotiate a lower price, since repairs and replacements can cost more than the used part is worth.